2026-07-16
Tool Calling & MCP in Open WebUI
A 30-minute, live-in-class walkthrough of two ways to give an Open WebUI model the ability to call external functions: Open WebUI's own native Tools, and real MCP (Model Context Protocol) servers bridged in via mcpo. Every command below is exactly what came up live, including the errors — the troubleshooting is as much the lesson as the happy path.
Prerequisites: Open WebUI already running and reachable in a browser (see the llama.cpp + Open WebUI setup doc). No API keys needed for either part.
Part A: Native Tool (Open WebUI's own tool-calling format)
Open WebUI lets you paste a Python function straight into the admin UI and hand it to a model as a callable tool — no extra server, no extra process.
1. Create the tool
Go to Workspace → Tools → + Create new tool, and paste in:
"""
title: Weather Lookup
description: Get current weather for a city using Open-Meteo (no API key needed)
"""
import requests

class Tools:
    def get_weather(self, city: str) -> str:
        """
        Get current weather for a city.
        :param city: Name of the city, e.g. "Bangalore"
        """
        geo = requests.get(
            "https://geocoding-api.open-meteo.com/v1/search",
            params={"name": city, "count": 1},
        ).json()
        if not geo.get("results"):
            return f"Could not find city: {city}"
        lat, lon = geo["results"][0]["latitude"], geo["results"][0]["longitude"]
        weather = requests.get(
            "https://api.open-meteo.com/v1/forecast",
            params={"latitude": lat, "longitude": lon, "current_weather": True},
        ).json()
        temp = weather["current_weather"]["temperature"]
        return f"Current temperature in {city}: {temp}°C"
This hits Open-Meteo, a free weather API with no signup, so the demo fetches real data rather than a mocked response. Save the tool.
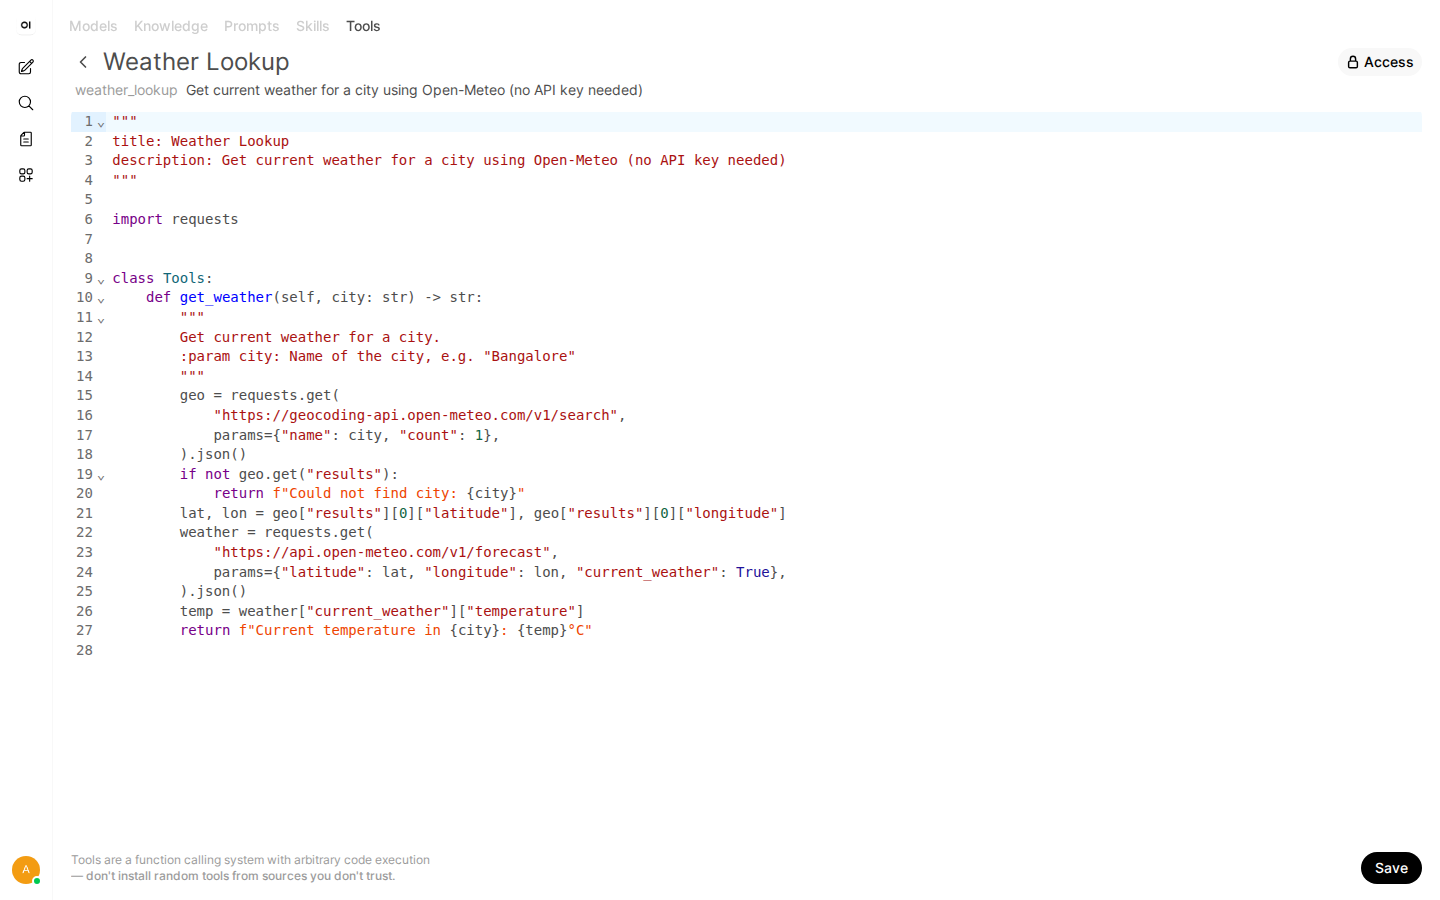
"""title / description""" docstring at the top and each method's own docstring are what the model sees as the tool's name and usage description.2. Enable it for a chat
Toggle the tool on in the Tools list, then in a chat click the tools icon (wrench/plug icon above the message box) and enable Weather Lookupfor the model you're chatting with.
3. Test it
Ask: "What's the weather in Bangalore right now?"
The model should call get_weather, and the response should cite the real current temperature — proof it actually ran the function rather than guessing.
Part B: Real MCP, bridged in with mcpo
Open WebUI doesn't speak MCP natively — it speaks OpenAPI. mcpo is a small proxy from the Open WebUI team that runs an MCP server as a subprocess and exposes it as an OpenAPI HTTP server, which Open WebUI canconsume as a "Tool Server." This is genuine MCP underneath, just translated at the edge.
1. Install uv
mcpo requires Python ≥3.11. Check your system Python first:
python3 --versionIf it's older than 3.11 (Ubuntu 22.04 ships 3.10.12), don't fight your system Python — use uv, which can fetch an isolated Python 3.11 on demand and run tools in throwaway environments via uvx.
curl -LsSf https://astral.sh/uv/install.sh | sh
source ~/.bashrcsudo apt install uv / sudo snap install astral-uv also exist, but tend to lag behind — the official installer script above is what Astral recommends and is what we used here.uv/uvx in ~/.local/bin. If uvx: command not found persists after source ~/.bashrc, run ls ~/.local/bin/ to confirm the binaries landed, then add the directory to your PATH explicitly:echo 'export PATH="$HOME/.local/bin:$PATH"' >> ~/.bashrc
source ~/.bashrc2. Run the bridge
uvx mcpo --port 8050 -- uvx mcp-server-timeThis starts mcpo on port 8050, which in turn launches mcp-server-time(a small official MCP server that answers "what time is it in X timezone") as a subprocess and translates its MCP calls into an OpenAPI server.
address already in use means something is already bound to that port — either pick a different port (--port 8051, etc.) or find and stop the earlier process with lsof -i :8050.Confirm it's up by opening http://localhost:8050/docs in a browser — you should see an auto-generated OpenAPI page listing the time-lookup endpoint.
3. Make it survive reboots: run as a systemd service
For anything beyond a one-off demo, run mcpo as a proper systemd service instead of a foreground terminal command. Systemd units do not inherit your shell's PATH, so the uvx binary needs either a full path or an explicit Environment=PATH=... line — this is exactly the class of bug that produces a mysterious uvx: command not found inside a service that works fine by hand.
sudo tee /etc/systemd/system/mcpo-time.service > /dev/null <<'EOF'
[Unit]
Description=mcpo MCP-to-OpenAPI bridge (mcp-server-time)
After=network.target

[Service]
Type=simple
User=<your-user>
WorkingDirectory=/home/<your-user>
ExecStart=/home/<your-user>/.local/bin/uvx mcpo --port 8050 -- uvx mcp-server-time
Restart=on-failure
Environment="PATH=/home/<your-user>/.local/bin:/usr/local/bin:/usr/bin:/bin"

[Install]
WantedBy=multi-user.target
EOF

sudo systemctl daemon-reload
sudo systemctl enable mcpo-time.service
sudo systemctl start mcpo-time.service
sudo systemctl status mcpo-time.service
If you had a foreground uvx mcpostill running from step 2, stop it (Ctrl+C) so it doesn't fight the service over the port. Then confirm the service took over:
curl -sI http://localhost:8050/docs
# HTTP/1.1 200 OK ...4. Register it in Open WebUI
Tool Servers are an admin-only setting, and where they live varies by version. In v0.10.2, the path is:
Click your profile avatar (bottom-left) → Admin Panel → Settings tab → Integrations (left sub-menu) → External Tool Servers → +. Enter the URL:
http://localhost:8050Save.
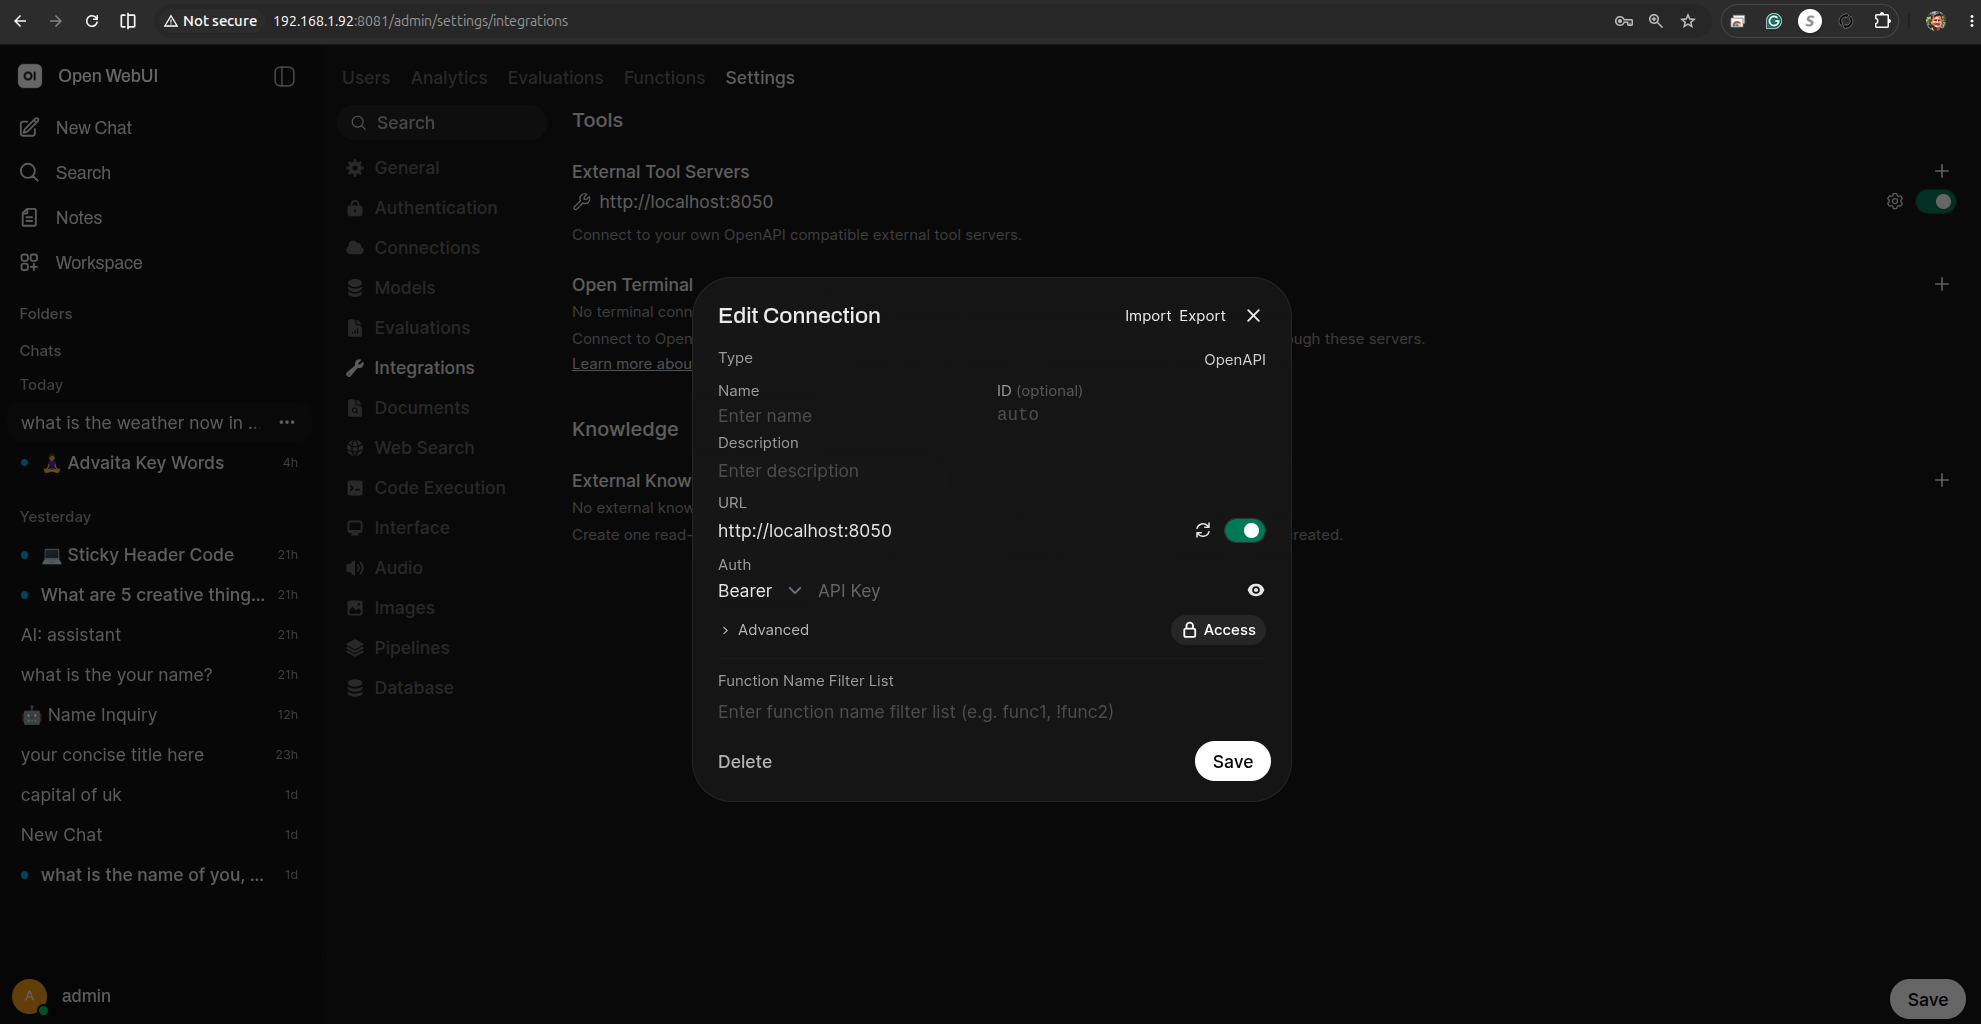
5. Where per-model Tools live (and why the MCP tool might not show up yet)
Open WebUI also has a Workspace → Models → Create/Edit page for building custom model presets (a saved persona wrapping a base model). It has its own Tools checklist section, worth knowing about since students will find it while looking for where to enable the MCP tool:
- Model Name / ID / Base Model — display name and which underlying model this preset wraps.
- Description / tags — cosmetic, for organizing multiple presets.
- Model Params → System Prompt — a persona/instruction baked into every chat using this preset.
- Advanced Params — generation params: temperature, top_p, top_k, mirostat, etc.
- Prompts / Knowledge — attach saved prompt templates or a RAG knowledge base to this preset.
- Tools — checkboxes for which native Workspace Tools (Python functions, like Weather Lookup) this preset auto-enables.
- Skills — composable capability bundles, empty until created under Workspace → Skills.
- Capabilities — which UI affordances this preset exposes (Vision, File Upload, Web Search, Code Interpreter, Terminal, Citations, etc.).
- Default Features / Builtin Tools — which of Open WebUI's own built-in tools (Memory, Notes, Calendar, Automations, etc.) are on by default for this preset.
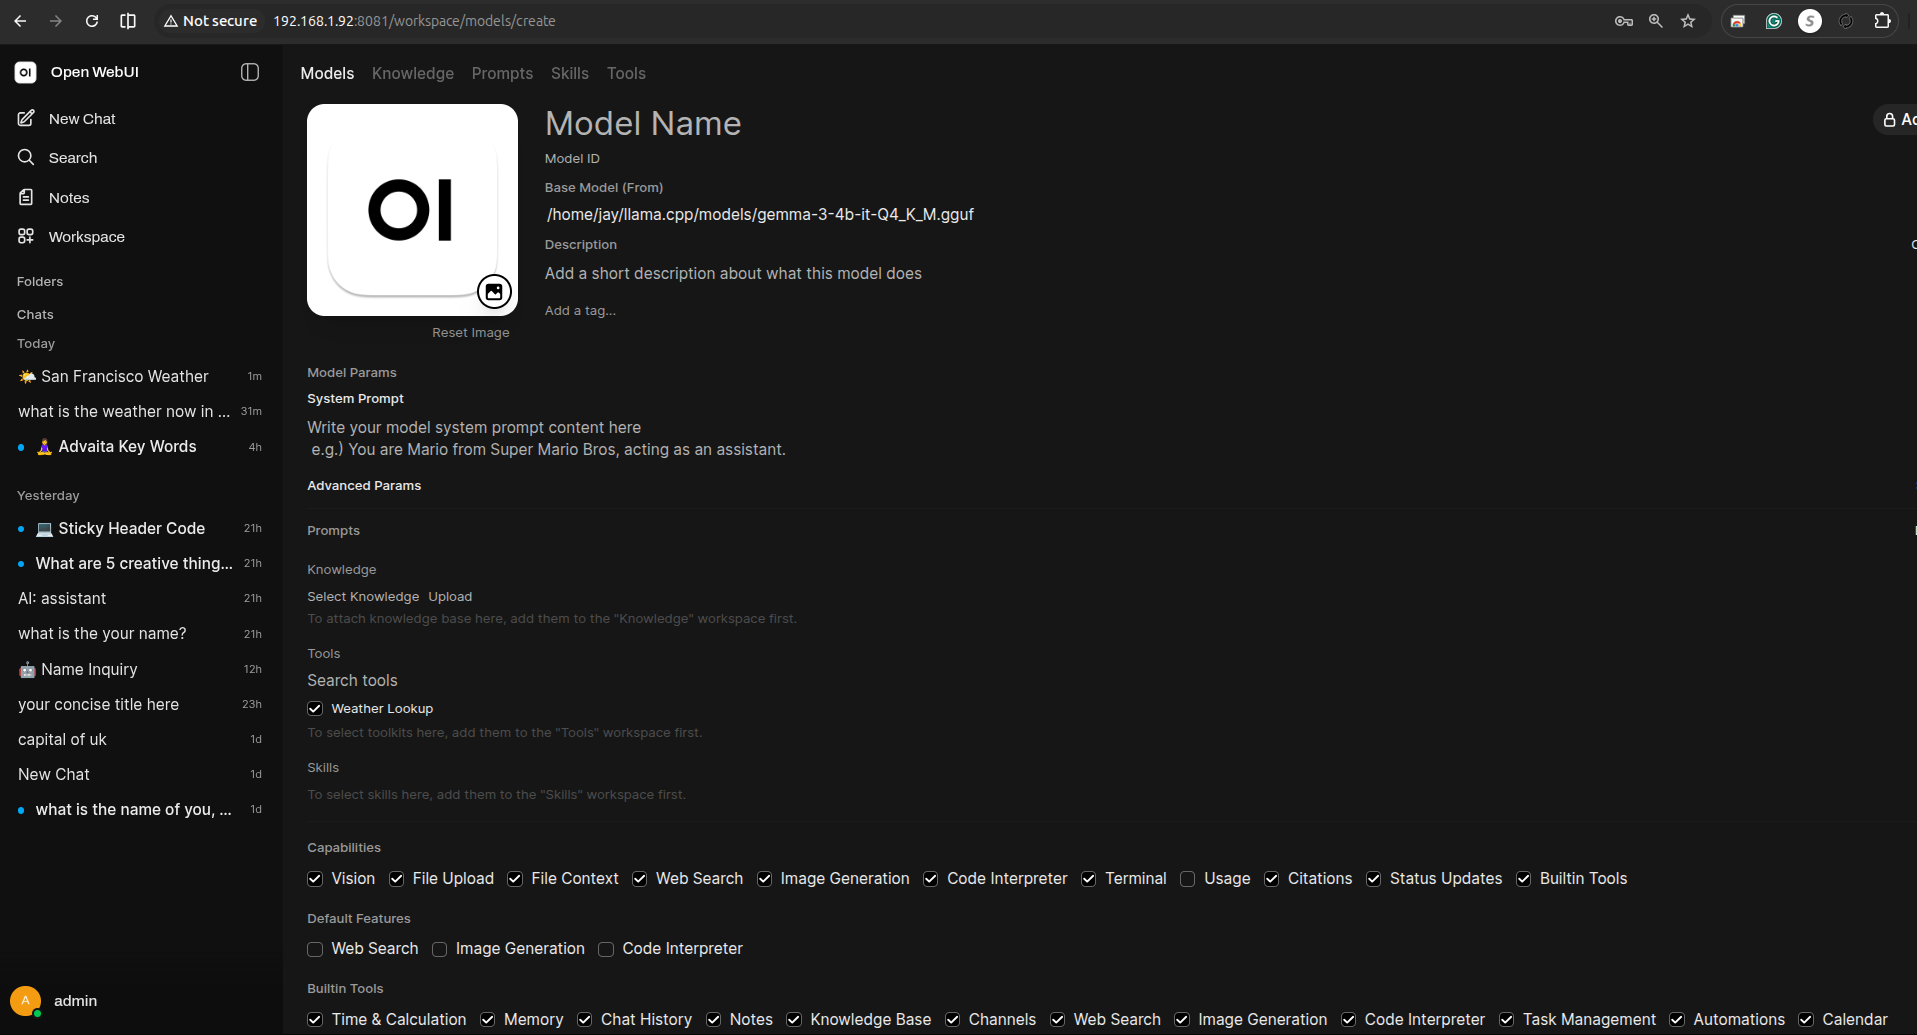
curl -s http://localhost:8050/openapi.json | head -40/get_current_time and /convert_time with full parameter schemas — proof mcpo and mcp-server-timeare working correctly. If you get a healthy response here but the tool still isn't listed in the chat's tools menu, the fix is usually just refreshing the page or logging out/in so Open WebUI re-fetches the external tool server list — it doesn't always pick up a newly-added connection live.6. Test it
In a new chat, enable the new tool server for the model, then ask: "What time is it in Tokyo?"
The response should reflect a real call out to mcp-server-time via the mcpobridge — genuine MCP, not Open WebUI's native tool format.
Summary
| Native Tool (Part A) | MCP via mcpo (Part B) | |
|---|---|---|
| Extra process? | No | Yes — mcpo bridging an MCP server |
| Protocol | Open WebUI's own tool format | Real MCP, translated to OpenAPI at the edge |
| Setup effort | Paste Python, toggle on | Install uv, run/service mcpo, register URL |
| Best for | Quick custom functions specific to Open WebUI | Reusing any existing MCP server unmodified |
Both end with the same result from the model's point of view — a function it can call mid-conversation — but Part B is the path to plugging in the growing ecosystem of pre-built MCP servers (filesystem, git, databases, Slack, etc.) without rewriting them as Open WebUI tools.